A screwdriver, four screws, and this page. Follow the step-by-step guide, watch the video, or send us your order — our team replies within 24 hours.
Tell us about your order and we'll get you set up fast.
Thanks — we've logged your request and our team will reply within 24 hours. While you wait, watch the install video below.
Watch the Install VideoMost homeowners are done before the coffee's cold. Here's where to start.
Six clear steps with photos — from marking the holes to snapping it in place.
See the guideStuck, missing a part, or unsure on sizing? Send your order — we reply fast.
Get support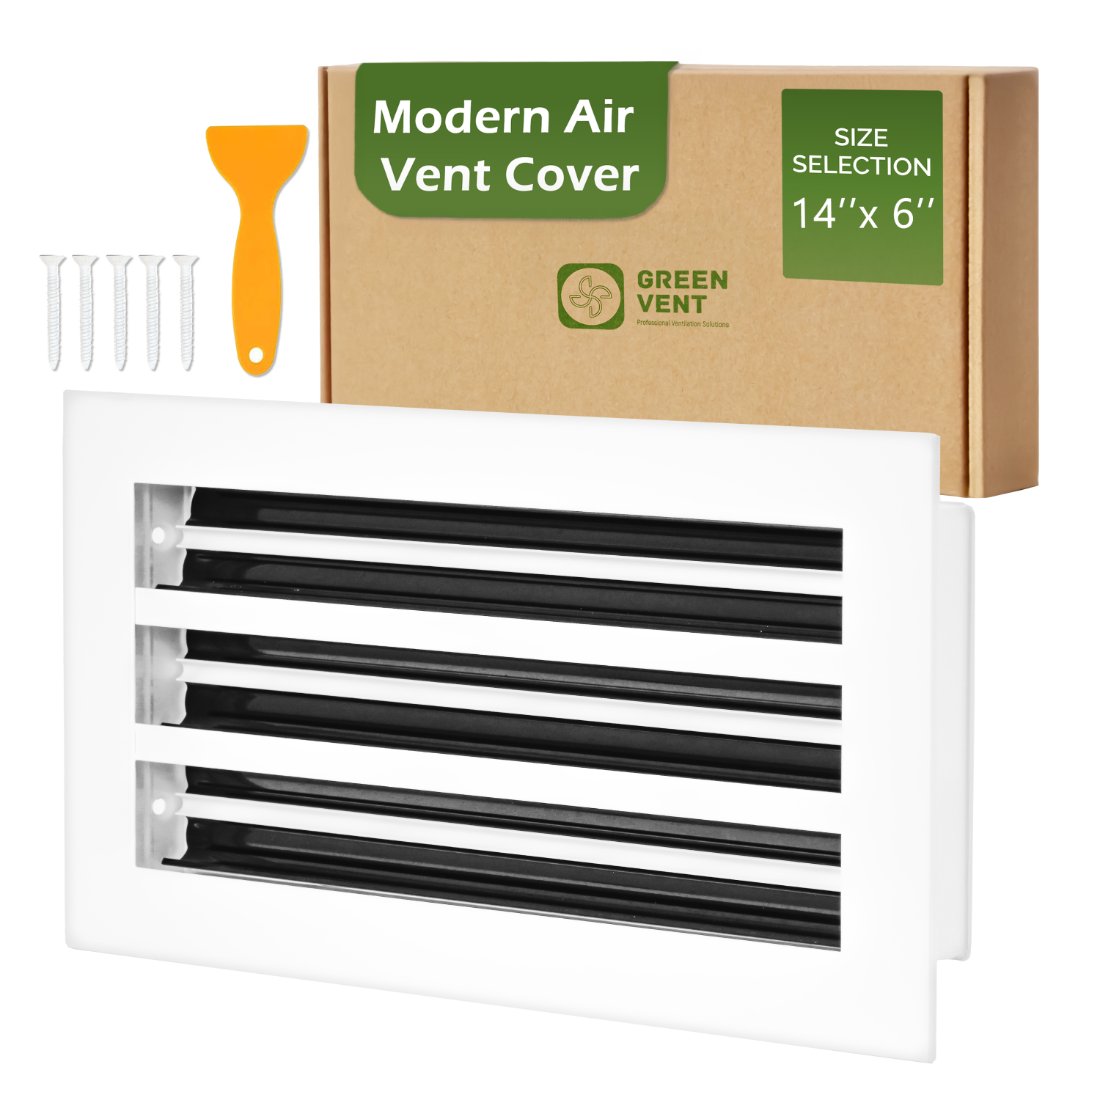
Open the box, grab a drill, and you're ready. No trips to the hardware store.
Applies to Linear Slot DiffuserSizing tip: Always measure your duct opening — not the old faceplate. Unsure? Send us a photo through the support form and we'll confirm your size.
No special tools. Just a marker, a drill, and the screws in your box.
Applies to Linear Slot Diffuser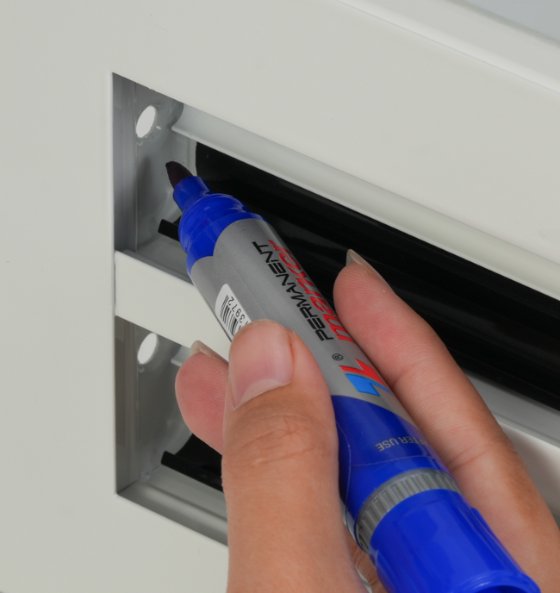
Hold the vent in place and mark where each screw will go.

Four marks in total — one near each corner of the opening.
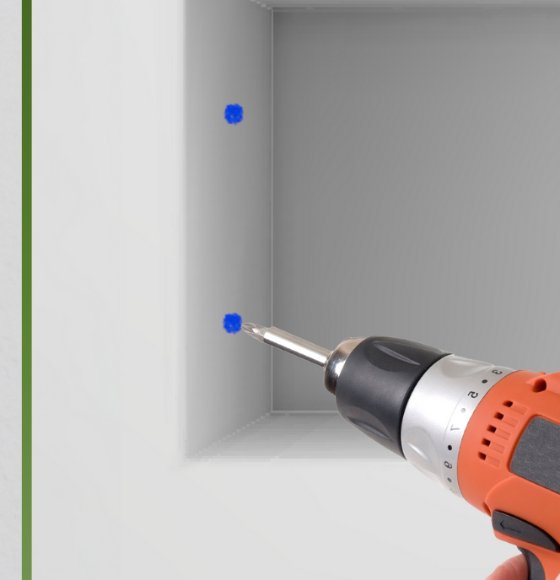
Carefully drill a small hole at each of the four marks.
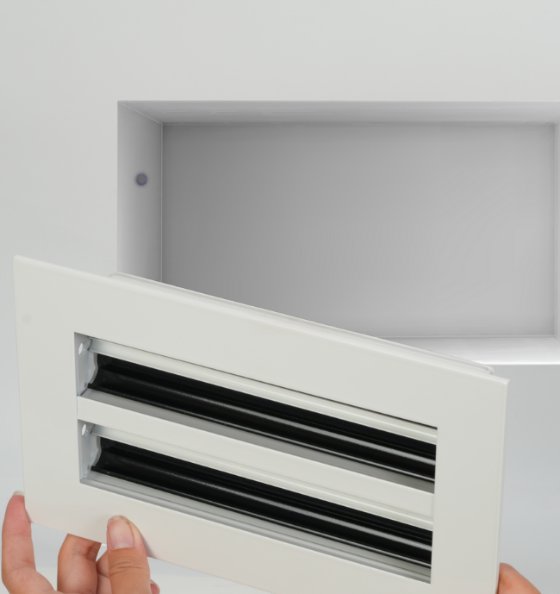
Line the vent up in the same position over the opening.
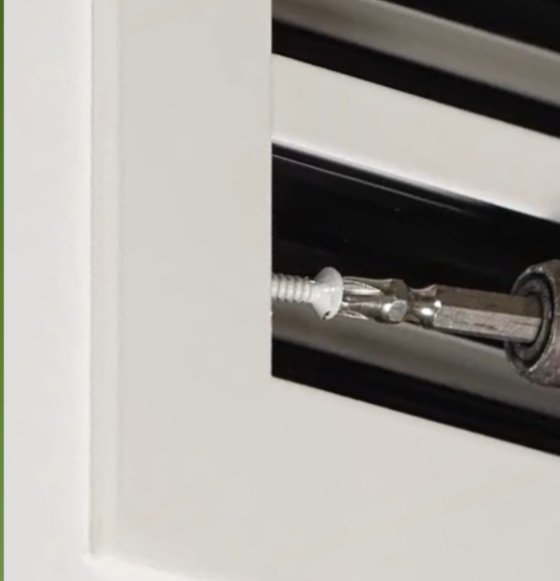
Drive a screw into each pilot hole until the vent sits flush.
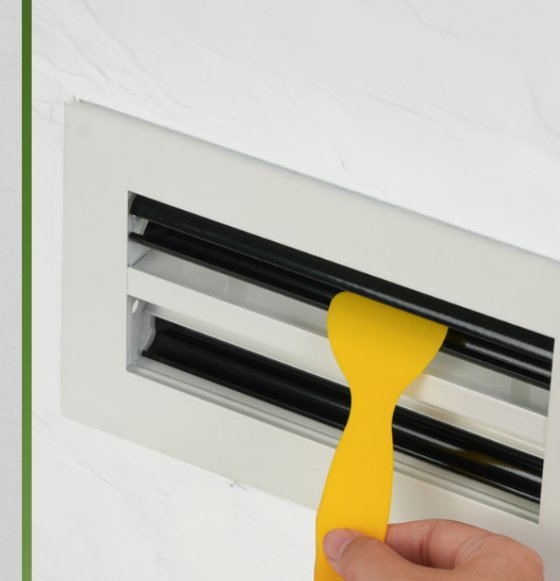
Slide the louvers to aim the air. That's it — you're done.
Prefer to watch it done? We filmed every step for you.
Watch the VideoShort, narrated walkthroughs for each product. Pick the one that matches your vent.
3:20
2:45
4:10Measure the duct opening in the wall/ceiling or floor — width first, then height — not the old faceplate. The faceplate is always larger than the hole. If you're between sizes or unsure, send a photo through the support form and we'll confirm the right fit.
No. A drill (or screwdriver) and the screws already in your box are all you need. The alignment tool is included too. Most installs take about 15 minutes.
We'll ship the missing parts free. Just submit your order number through the support form above and select "Missing parts" — we'll have a replacement on the way.
No. Green Vent covers are lightweight aluminum with a white powder-coat finish — rust-proof and built to last a decade, even in bathrooms and kitchens.
Usually one screw is a touch tight or the opening has a burr. Back the screws out slightly, reseat the vent evenly, then tighten in a cross pattern. Still uneven? Send us a photo and we'll walk you through it.
Every Green Vent product is covered against manufacturing defects. If anything arrives damaged or fails in normal use, submit your order with "Warranty / replacement" and we'll make it right.
Send your order through the form and a Green Vent specialist will reply within 24 hours — or reach us directly below.